
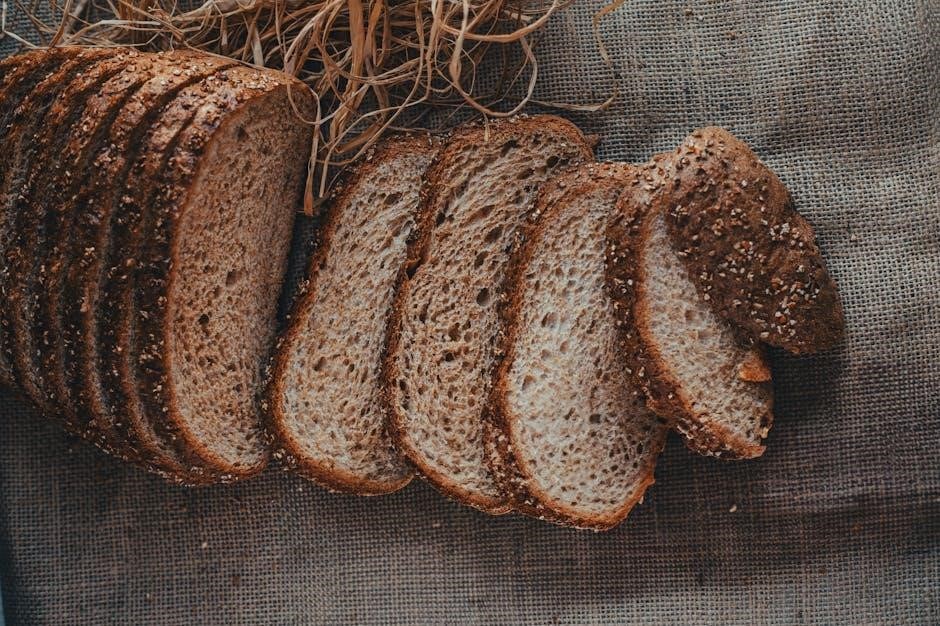
KBS bread machines, celebrated for their two-paddle systems and heated lids, consistently deliver superior loaf quality, enhancing texture and crust development for optimal results.
What is a KBS Bread Machine?
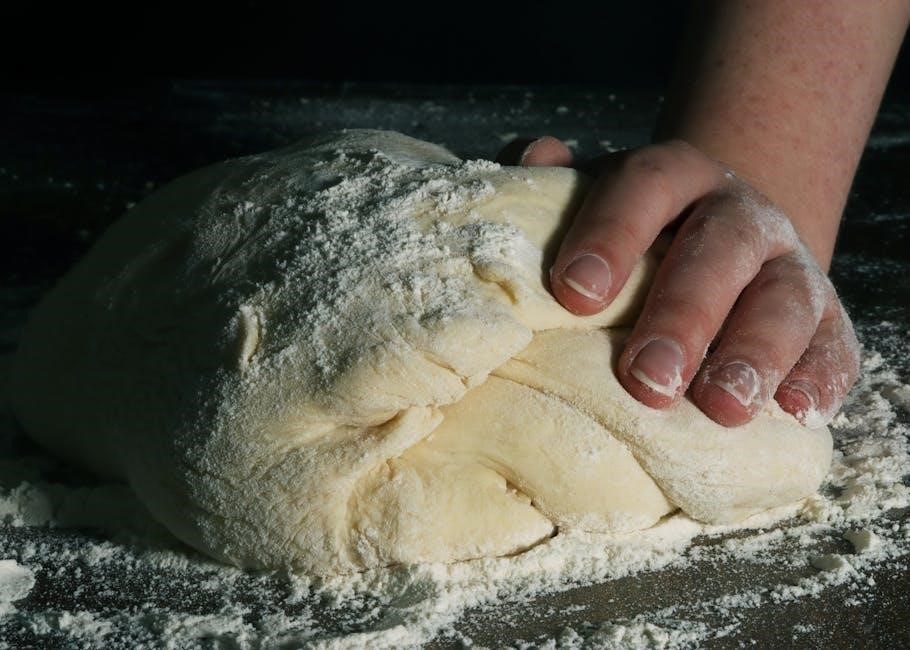
KBS bread machines represent a specific category within the automated bread-making appliance market, often distinguished by key features that enthusiasts prioritize. Unlike some models, KBS machines frequently incorporate a dual-paddle kneading system, significantly impacting dough development and final bread texture. This design minimizes dense spots often found at the loaf’s base, promoting even kneading throughout the entire process.
Furthermore, many KBS machines boast a heated element within the lid. This crucial component ensures a consistently crisp and well-roasted crust, mimicking the results achieved in a traditional oven. While nut dispensers are sometimes included, they aren’t considered core to the machine’s primary function – producing excellent bread. The focus remains on the fundamental aspects of kneading and baking, delivering consistently high-quality loaves.
Why Choose a KBS Bread Machine?
Choosing a KBS bread machine centers around prioritizing quality and consistent results. The dual-paddle system is paramount, offering superior dough handling compared to single-paddle alternatives, leading to lighter, more evenly textured bread. The heated lid element is equally vital, guaranteeing a properly browned and delightfully crisp crust – a common shortcoming in other machines.
While features like nut dispensers are convenient, KBS machines focus on excelling at the core function: baking exceptional bread. Experienced bakers appreciate this dedication to fundamentals. Starting with a used Black & Decker two-paddle model is a viable entry point, but ultimately, investing in a KBS machine, like a Zojirushi, offers a reliable path to consistently delicious homemade bread.
Understanding Key Features
Key features of KBS bread machines include the crucial two-paddle kneading system and a heated lid element, both contributing significantly to bread texture and crust quality.
Two-Paddle System: The Importance
The two-paddle system is arguably the most essential feature in a KBS bread machine, dramatically improving the final product. Unlike single-paddle designs, two paddles ensure more thorough and even kneading throughout the entire loaf. This results in a less dense bread, particularly at the bottom, which often suffers from compaction with single-paddle machines.
The enhanced kneading action distributes ingredients more uniformly, leading to a consistent texture from crust to crumb. Experienced bread machine users consistently recommend prioritizing a two-paddle system when selecting a machine, recognizing its significant impact on loaf quality. It’s a fundamental element for achieving bakery-style bread in a home environment, offering a noticeable upgrade over simpler designs.
Heated Lid Element: Achieving Perfect Crust
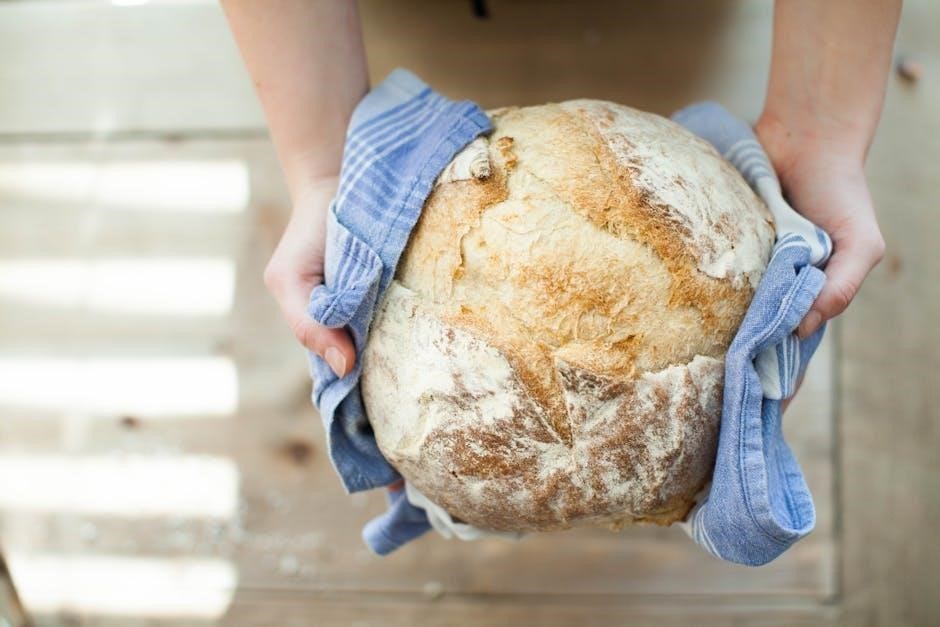
A heated lid element is a crucial feature for achieving a properly roasted and textured crust in KBS bread machines. Traditional bread machines often struggle to fully bake the top of the loaf, resulting in a pale and sometimes slightly undercooked crust. The heated lid addresses this issue by providing consistent heat from above, mimicking the environment of a conventional oven.
This ensures even browning and a delightful, crisp texture. The element contributes to a more professional-looking and flavorful loaf. Many users consider it second only to the two-paddle system in importance, highlighting its significant impact on the overall quality and appeal of the finished bread. It elevates the bread machine experience considerably.
Nut Dispensers: Convenience vs. Core Functionality
Nut dispensers are a convenient addition to some KBS bread machines, automatically adding ingredients like nuts, seeds, or dried fruit at the optimal point in the baking cycle. However, they aren’t considered essential for producing high-quality bread. While offering convenience, experienced bread makers often find the machine’s audible beep, signaling the time to manually add ingredients, perfectly adequate.
Prioritizing a two-paddle system and a heated lid element yields more substantial improvements in bread texture and crust. Nut dispensers are a “nice-to-have” feature, but shouldn’t be a deciding factor when choosing a machine. Focusing on the core functionalities ensures consistently excellent results, even without automated ingredient addition.
Getting Started with Your KBS Bread Machine
Initial setup involves cleaning and understanding the control panel; trial and error is key to mastering the machine’s functions and achieving baking success.
Initial Setup and Cleaning
Before your first loaf, thoroughly clean all removable parts – the kneading paddle(s) and the bread pan – with warm, soapy water. Ensure they are completely dry before reassembling. A quick wipe-down of the machine’s interior and exterior is also recommended.
Discard the first loaf as a test run to eliminate any potential manufacturing residue. Don’t be discouraged if it isn’t perfect! This initial cycle helps season the machine. Familiarize yourself with the machine’s components; even though the included booklets are often poorly translated, understanding the basic parts is crucial.
Proper cleaning after each use prevents buildup and ensures longevity. Avoid abrasive cleaners, as they can damage the non-stick coating of the bread pan. Regular maintenance is key to consistent, high-quality bread.
Understanding the Control Panel
The control panel, while potentially confusing initially, governs all machine functions. Locate the cycle selection buttons – Basic, Whole Wheat, French, Dough, and Quick Bake are common options. Pay attention to the crust color settings (Light, Medium, Dark) to achieve your desired browning level.
The start/stop button initiates and halts the bread-making process. Many machines feature a timer function for delayed starts, allowing you to enjoy fresh bread in the morning. The display panel indicates the current cycle stage (kneading, rising, baking).
Experimentation is key; don’t hesitate to try different settings and observe the results. Though the manual may be lacking, trial and error will quickly reveal the panel’s functionality.
Powering On and Basic Operation
To begin, ensure the bread pan is securely locked into place. Add ingredients in the order specified by your recipe – typically liquids first, followed by dry ingredients, with yeast last. Select your desired cycle (Basic is a good starting point) and crust color.
Press the start button to initiate the process. The machine will automatically knead, rise, and bake the bread. Resist the urge to open the lid during baking, as this can affect the loaf’s rise.
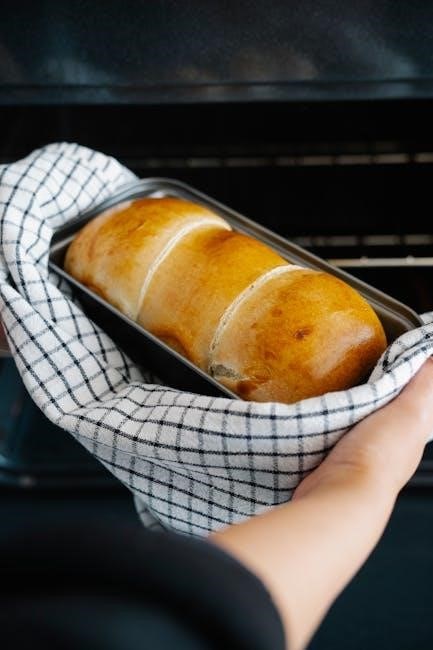
The machine will beep when the cycle is complete. Carefully remove the bread pan using oven mitts, as it will be hot. Allow the bread to cool slightly before slicing and enjoying your freshly baked loaf!
Ingredients and Recipes
Successful baking hinges on quality ingredients; instant and active dry yeasts behave differently, and flour quality significantly impacts the final bread texture and taste.
Yeast Types: Instant vs. Active Dry
Understanding yeast differences is crucial for consistent KBS bread machine results. Recipes often specify “instant yeast,” also known as bread machine yeast, due to its quicker activation. However, active dry yeast is a viable substitute, but requires adjustments. Generally, you’ll need to increase the amount of active dry yeast used compared to instant yeast in a recipe – a common guideline is to use 1.25 teaspoons of active dry yeast for every 1 teaspoon of instant yeast called for.
Active dry yeast benefits from proofing – dissolving it in warm water with a pinch of sugar – before adding it to the other ingredients. This confirms its viability. Instant yeast, conversely, can be added directly to the dry ingredients. Ignoring these nuances can lead to under-proofed dough or a loaf that doesn’t rise adequately, impacting the final texture and flavor.
Flour Quality and its Impact on Bread
Flour isn’t created equal, and its quality significantly impacts your KBS bread machine’s output. Higher protein content in flour, particularly bread flour, develops more gluten, resulting in a chewier, more structured loaf. All-purpose flour works, but may yield a softer, less robust texture. Avoid using old or improperly stored flour, as it can lose its potency and affect rising.
Investing in quality flour is a worthwhile step towards consistently delicious bread. Different brands and even batches can vary, so experimentation is encouraged. Consider the intended bread type; whole wheat flour requires adjustments to liquid levels due to its absorption properties. Remember, superior ingredients consistently yield superior bread, maximizing your KBS machine’s potential.
Finding Reliable KBS Bread Machine Recipes
Starting with proven recipes is crucial for KBS bread machine success. While the included booklets are often poorly translated, numerous online resources offer reliable options. “Bread Dad” is a frequently recommended starting point, alongside general searches for “bread maker recipes.” Be mindful of yeast specifications – recipes calling for instant yeast require adjustments if using active dry yeast, typically needing more active dry.
Don’t be afraid to experiment, but begin with well-tested formulas. Trial and error are key to mastering your machine. Remember, online communities and forums dedicated to bread making can provide valuable insights and troubleshooting advice.
Utilizing Machine Functions
KBS machines offer diverse cycles, including a valuable “Raw Dough” function for mixing doughs beyond bread, enabling versatile baking and culinary exploration.
Basic Bread Cycle Explained
The standard bread cycle on a KBS machine automates the entire bread-making process, from initial kneading and bulk fermentation to a final proofing stage and baking. Typically, this cycle begins with ingredient mixing, followed by several kneading phases to develop gluten structure. A warm, humid environment then encourages yeast activity during fermentation, allowing the dough to rise.
After fermentation, a brief degas stage gently removes excess air. The dough then undergoes a second, shorter proofing period before the baking phase commences. The heated lid element, a key KBS feature, ensures even crust development. Remember, trial and error are crucial; don’t be afraid to experiment and learn from each loaf. The machine beeps to signal when additions, like nuts, are needed.
The “Raw Dough” Function: Beyond Bread
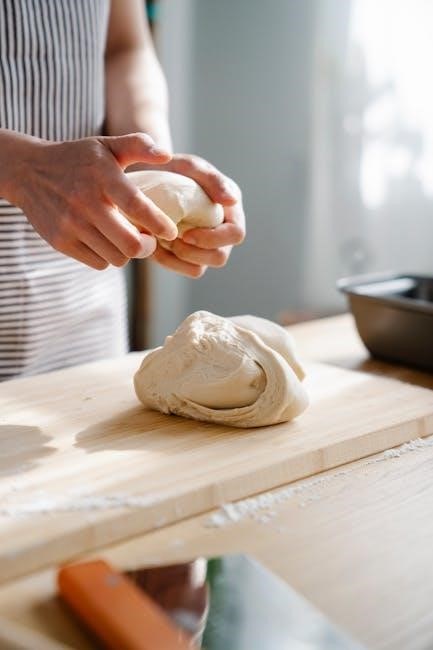
The “Raw Dough” function unlocks versatility beyond traditional loaves. This cycle performs the kneading and initial rise, delivering a perfectly prepared dough ready for alternative baking methods. Imagine crafting homemade pizzas, cinnamon rolls, or even pasta – all starting with dough expertly mixed by your KBS machine!
While the function’s description might be limited in the manual, its utility is substantial. Simply select the cycle, add your ingredients, and let the machine do the work. Afterwards, shape the dough as desired and bake in a conventional oven. It’s a fantastic way to leverage your bread machine for a wider range of culinary creations, expanding your baking possibilities significantly.
Customizing Cycles for Different Bread Types
KBS bread machines offer pre-programmed cycles, but true mastery comes from customization. Experimenting with cycle times and temperatures allows you to tailor bread to your exact preferences. For example, a longer rise time yields a more developed flavor, while a higher temperature creates a crispier crust.
Don’t be afraid of trial and error! Start with a basic recipe and adjust one variable at a time, carefully noting the results. Different flour blends and ingredient additions will also necessitate adjustments. Remember, the machine’s manual is a starting point; your baking journey is about discovering what works best for your taste and ingredients. Embrace the learning process!

Troubleshooting Common Issues
Dense bread, uneven kneading, or crust problems are common. Adjusting yeast, flour quality, or cycle times often resolves these issues with practice and patience.
Dense Bread: Causes and Solutions
Dense bread is a frequent frustration for new bread machine users, but it’s often easily remedied. Several factors contribute to this issue. Incorrect yeast measurement is a primary culprit; ensure you’re using the correct amount, especially when substituting active dry yeast for instant yeast, as active dry requires more.
Flour quality also plays a crucial role. Lower-quality flour may lack the protein needed for proper gluten development. Additionally, insufficient kneading can prevent adequate air incorporation, leading to a dense texture. Ensure your machine’s paddles are functioning correctly and thoroughly mixing the dough.
Finally, excessive liquid or not enough flour can also cause density. Carefully measure ingredients and consider slightly reducing liquid in future attempts. Experimentation is key, and remember that trial and error are part of the learning process!
Uneven Kneading: Addressing the Problem
Uneven kneading often manifests as pockets of unmixed flour or a dough that appears lumpy rather than smooth. A key factor is ensuring the correct liquid-to-flour ratio; too little liquid hinders proper gluten development. The two-paddle system in KBS machines generally mitigates this, but ingredient order matters – liquids first!
Check that the paddles are securely attached and rotating freely. Occasionally, a paddle can become slightly dislodged. Overloading the machine with too much flour can also strain the motor and lead to incomplete kneading. Start with recommended recipe amounts.
If the problem persists, briefly pause the machine and manually redistribute the unmixed flour. Remember, patience and experimentation are vital for mastering bread machine baking!
Crust Issues: Too Pale or Too Dark
Pale crusts frequently indicate insufficient heat or a lack of sugar in the recipe. KBS machines with a heated lid element generally resolve this, but ensure it’s functioning correctly. A brush of melted butter or milk before baking can also encourage browning. Conversely, dark crusts suggest excessive heat or too much sugar.
Reduce the crust color setting if your machine offers one. If not, try slightly decreasing the sugar content in your recipe. Remember that flour type impacts browning; whole wheat tends to darken faster.
Monitoring the baking process is key; if the crust darkens too quickly, consider tenting the loaf with foil during the final stages.
Maintenance and Care
Regular cleaning and proper storage are vital for extending your KBS bread machine’s lifespan, ensuring consistent performance and preventing issues over time.
Cleaning Your KBS Bread Machine
Thorough cleaning after each use is crucial. Always unplug the machine and allow all parts to cool completely before disassembly. Remove the kneading paddle(s) and baking pan; these are typically non-stick coated and can be washed with warm, soapy water. Avoid abrasive cleaners, as they can damage the coating. The baking pan may also be dishwasher safe – consult your specific model’s manual.
Wipe down the machine’s exterior with a damp cloth. For stubborn residue inside the bread machine, a slightly damp cloth can be used, but avoid getting water into the electrical components. Ensure everything is completely dry before reassembling and storing. Regular cleaning prevents buildup and ensures optimal performance, contributing to the longevity of your KBS bread machine.
Long-Term Storage Tips
When storing your KBS bread machine for extended periods, meticulous preparation is key. Ensure the machine is completely clean and dry, as detailed previously, to prevent mold or odors. Remove the kneading paddle(s) and baking pan, storing them separately in a dry location. Consider placing a desiccant packet inside the machine’s housing to absorb any residual moisture.
Store the bread machine in its original packaging, if available, or a dust-free area, away from direct sunlight and extreme temperatures. Avoid stacking heavy items on top of it. Periodically check the machine during storage to ensure no issues arise. Proper storage safeguards your investment and ensures it’s ready for baking when you are.
Extending the Lifespan of Your Machine
To maximize the longevity of your KBS bread machine, consistent care is paramount. Avoid using abrasive cleaners, opting instead for a damp cloth and mild detergent for cleaning. Regularly inspect the kneading paddle and non-stick coating for wear, replacing them as needed. Don’t overload the machine beyond its stated capacity, as this strains the motor.
Be mindful of the power cord, avoiding kinks or damage. Proper ventilation during operation prevents overheating. Embrace trial and error, but don’t be afraid to consult resources like “Bread Dad” when encountering issues. Consistent, gentle use and preventative maintenance will ensure years of delicious homemade bread.
Advanced Techniques
Experimentation with flour blends, additions like fruits and nuts, and altitude adjustments unlocks the full potential of your KBS bread machine for customized baking.
Experimenting with Flour Blends
Unlocking nuanced flavors and textures in your bread begins with exploring different flour combinations. While standard bread flour provides structure, incorporating whole wheat adds a nutty depth and increased nutritional value. Rye flour introduces a distinctive tang, perfect for darker, more robust loaves.
Don’t be afraid to blend! A 50/50 mix of bread and whole wheat is a great starting point. For a softer crumb, consider adding a small percentage of pastry flour. Remember that different flours absorb liquids differently, so adjustments to hydration may be necessary.
Keep detailed notes on your experiments – flour ratios, hydration levels, and resulting textures. This iterative process is key to mastering the art of flour blending within your KBS bread machine, leading to truly personalized and delicious results.
Adding Fruits, Nuts, and Seeds
Elevate your KBS bread machine creations with the delightful addition of fruits, nuts, and seeds! These ingredients introduce exciting textures and flavors, transforming a simple loaf into a gourmet treat. However, timing is crucial for optimal incorporation.
Utilize the machine’s nut dispenser for smaller additions like seeds or chopped nuts, ensuring even distribution. For larger, more delicate ingredients like dried fruits, wait for the beep signaling the add-in stage. This prevents them from becoming crushed during the kneading process.
Consider soaking dried fruits beforehand to plump them up and enhance their moisture content. Remember that adding too many inclusions can affect the bread’s structure, so start with moderate amounts and adjust to your preference.
Adjusting Recipes for Altitude
Baking with a KBS bread machine at higher altitudes requires recipe adjustments to counteract the effects of lower air pressure. Generally, less yeast is needed as it rises more quickly, and increased liquid compensates for faster evaporation.
As a starting point, reduce yeast by 1/4 teaspoon for every 1,000 feet above sea level. Simultaneously, add 1 tablespoon of liquid per cup of flour for every 1,000 feet. These are guidelines; experimentation is key!
Monitor the dough’s consistency closely. It may appear stickier at altitude, so avoid adding excessive flour; A slightly wetter dough often yields a softer, more tender crumb. Embrace trial and error – your KBS machine can still deliver fantastic results with careful adjustments.